

Cricut.com/setup
Cricut.com/setup is the official link to set up a Cricut machine on your windows or mac device. It’s the best software suite that lets you design and manages all the Cricut cutting projects. Its user interface is straightforward and intuitive. It has a huge font collection and a tool for drawing shapes and cutting lines. Also, it comes with multiple features so that you can add Text, among other things. It permits you to add shapes and cut lines with a range of options, including rotation, size, and color. It may also connect to the Design Space software, which can be downloaded and installed from cricut.com/setup. This software has a collection of shapes, typefaces, and images.
How To Use Cricut Machine Via Cricut.com/setup?
- First, connect your Cricut machine to your computer. (Visit cricut.com/setup to know)
- Now, you have to transfer the image you will be using onto your Cricut machine.
- Make sure that you are selecting the proper material for this image. For example, if it is on vinyl, it can’t be printed on fabric.
- Once you have shared the image, you can use it on your Cricut machine.
- Now, once you cut out the image, you can either print it out or use it directly.
- Print your image, and cut it out once it is totally printed.
- Visit cricut.com/setup to know how you can perfectly iron your image onto the material.
- Once ironed, your image will remain on the material.
- Now, you are all set to enjoy your new creation.
How To Print Via Cricut.com/setup?
- Once you have inserted images in your project, select “Make It” from Design Space. (Download Design Space from cricut.com/setup).
- An image preview with an added cut sensor marking will be displayed.
- Select “Continue” to proceed.
- Now, on the next screen, you will have to select your machine from the drop-down menu.
- After that, select the “Send to Printer” option to open the “Print Then Cut” dialog.
- An image bleed will then be applied to the image(s) so that there will be no white border left once the final cut is complete.
- Print the page using your home printer.
- Now, simply place the paper on the cutting mat & feed it to the Cricut machine.
- The machine will scan for the sensor marking and then cut around the image with precision.
- To know the printing process better, visit cricut.com/setup.
How To Download Font To Cricut Design Space From Cricut.com/setup?
In order to use your Cricut machine, you need to download and install Cricut Design Space software via cricut.com/setup (the official website). And now, to proceed with your projects, you might want third-party fonts on Cricut Design Space. Let’s have a look at the following steps:
Step 1:
- First of all, you need to figure out the platform from where you will need to download free fonts for Cricut.
- After that, ensure which font you want to download for cricut.com/setup.
Step 2:
- Cricut Design Space software doesn’t offer a particular function that adds free fonts. Thus, you need to install the font on your PC first.
- Then, the design space will detect and add this font automatically.
- Next, you must unzip the font file and find the OTF or TTF file.
- After that, Right-click the OTF or TTF file.
- Choose the Install option now.
- Now, the font has been successfully installed on the PC.
Step 3:
- It is time to use the installed font in the Cricut design space.
- You need to download Cricut Design Space software via cricut.com/setup.
- Then, launch this software on your PC.
- Next, sign in to this software and then make sure your Cricut machine is connected to the PC.
- Tap “New Project”
- After that, click the Text. (This will open a text box).
- In the text box, you have to enter a few words.
- After that, Cricut will display another box displaying the words you just typed, and it will add a font to the Text automatically.
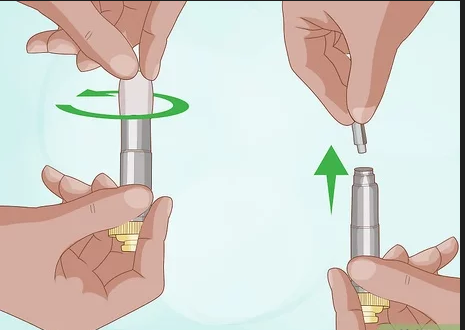
How To Replace A Cricut Blade?
After knowing the downloading process of the fonts into the Cricut design space (that is a must-download from cricut.com/setup), it’s time to know how you can replace a Cricut blade. Although, at cricut.com/setup, you will find all your answer. But for now, follow the quick instructions below to know the process:
- The first step will be to remove the blade housing from your Cricut Machine.
- Next, you will have to remove the blade from the housing. For that, grab your needle nose pliers or the blade’s end. Pull it straight out.
- Now, put a new Cricut blade in the housing.
- Finally, now put the blade housing back into your Cricut.com/setup machine.
- Slide the housing into its place.
- Close the “clamp.”
- Try to do a test cut with your new blade before proceeding to a new project.
How To Make Keychains With Cricut?
After acknowledging the basics of the Cricut machine, let’s know another most beautiful creation of the Cricut machine. The Keychains! Visit cricut.com/setup to know or keep reading the overall process to make it.
Supplies You Need:
- Awl
- Pliers
- Cricut cutting machine
- Permanent vinyl
- Optional: clear vinyl to protect it
- Keychain blanks and hardware (or get a complete set with tassels)
- Standard Grip mat
- Transfer tape
- Basic tool set
Prepare Your Keychain Design Through Design Space Via Cricut.Com/Setup
- In Cricut design space software, open a new project.
- Then, on the new project screen, click upload.
- Upload your SVG file and follow the instructions in order to add it to your projects.
- You will see that each design is an individual layer.
- After that, you need to disable the layers you don’t want to make.
- Now, accordingly, adjust your color settings that suit your project.
- Next, simply resize your layers to fit your blanks.
- When you are done with your keychain design, save and hit the “make it” button.
- Visit Cricut.com/setup to know more.
Make Keychains With Cricut: Assembling Process
- The first step is to remove the film from both sides of your acrylic blank.
- Cut out your design and a backing piece on your Cricut and weed.
- Apply your transfer tape and try to cut it as close to the design as you can.
- Line it up to your acrylic piece & apply.
- If needed, use a bit of removable tape on the back of your blank so that you can tape it to the surface while using the vinyl.
- Use a scraper/squeegee to adhere it well to your blank.
- After that, carefully peel back the transfer tape.
- Apply the backing piece now.
- Using your awl, push the vinyl via the hole at the top.
- Then, twist it a little, so the vinyl will be flush, and you will have a perfect hole for your keychain component.
- Now, using your pillars, you will need to attach your jump ring through the hole you just made.
- Hang the tassel on the front side.
- And then, simply attach the keychain component to the back.
- Now, close the jump ring and your keychain.
- In order to know this process better, Visit the official website of Cricut – cricut.com/setup.